01.
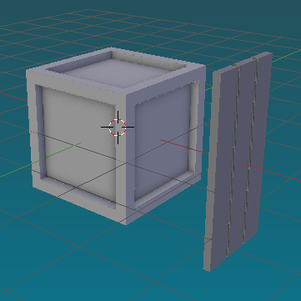
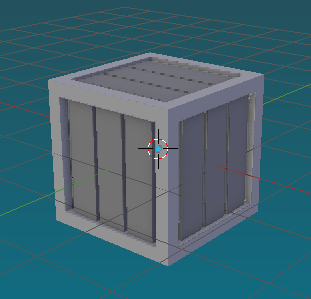
Use Grab, Rotate & Scale to move the wood planks into place. (Don't forget to lock the axis. Press X, Y, or Z, after you grab, rotate, or scale.)
Duplicate the wood planks with Shift+D
After you press R to rotate, type 90 to indicate that you want it to rotate 90 degrees.
Duplicate the wood planks with Shift+D
After you press R to rotate, type 90 to indicate that you want it to rotate 90 degrees.
02.
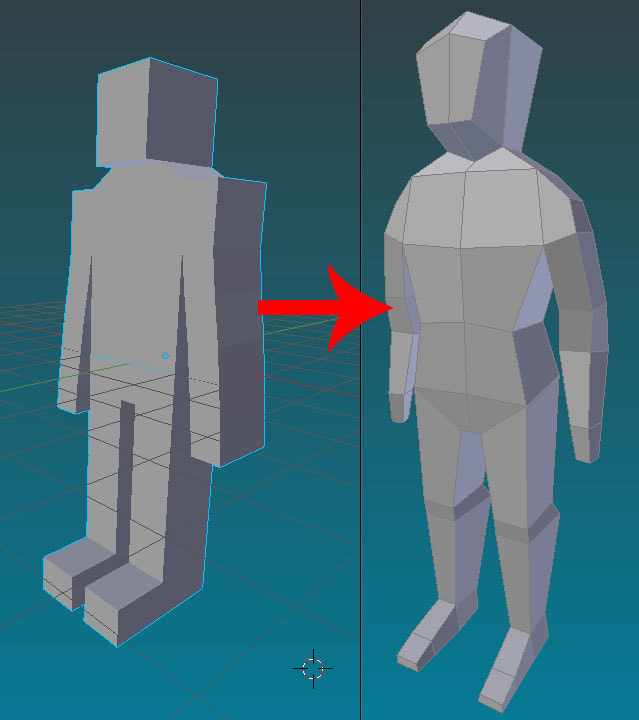
Using nothing but Grab, Rotate, & Scale, manipulate the geometry of the blocky character to look like the character on the right.
Press Z to switch between wireframe and shaded mode.
Press B to make a box selection. Drag a box around what you want to select.
Press Z to switch between wireframe and shaded mode.
Press B to make a box selection. Drag a box around what you want to select.
03.
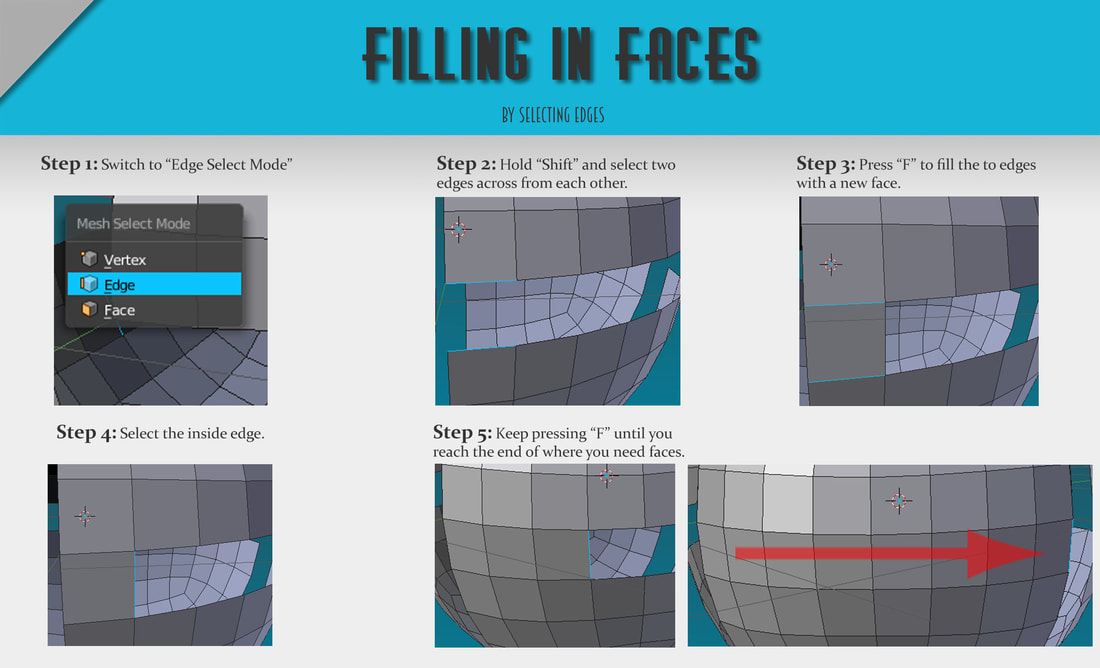
Using the guide above, download the sphere file and fill in all of the empty gaps.
04.
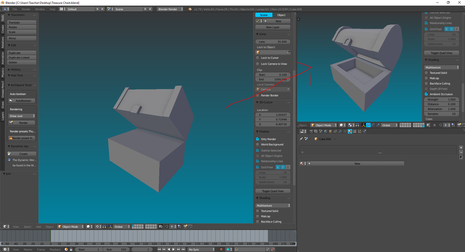
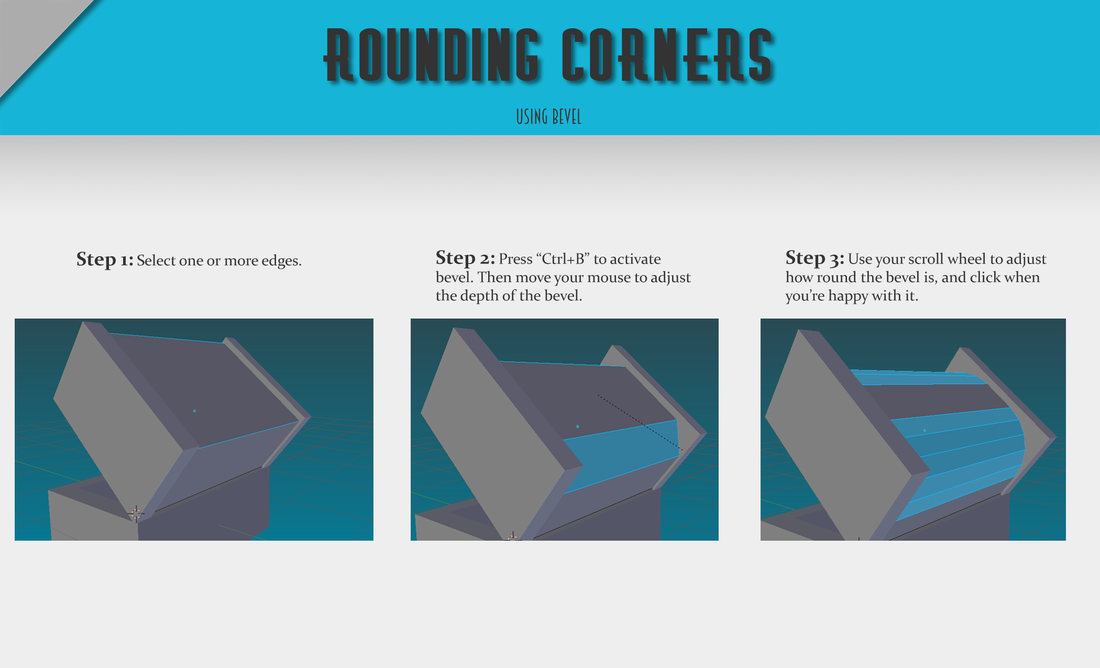
Create the finished treasure chest shown above. Use the "BEVEL" guide, "Rounding Corners" to help you make the treasure chest round at the top.
05.
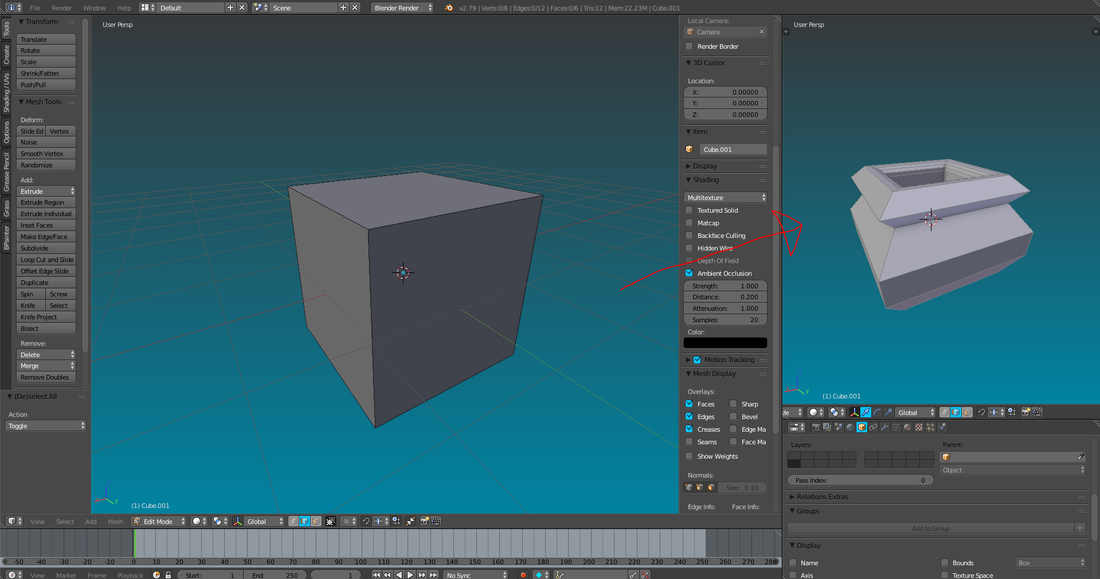
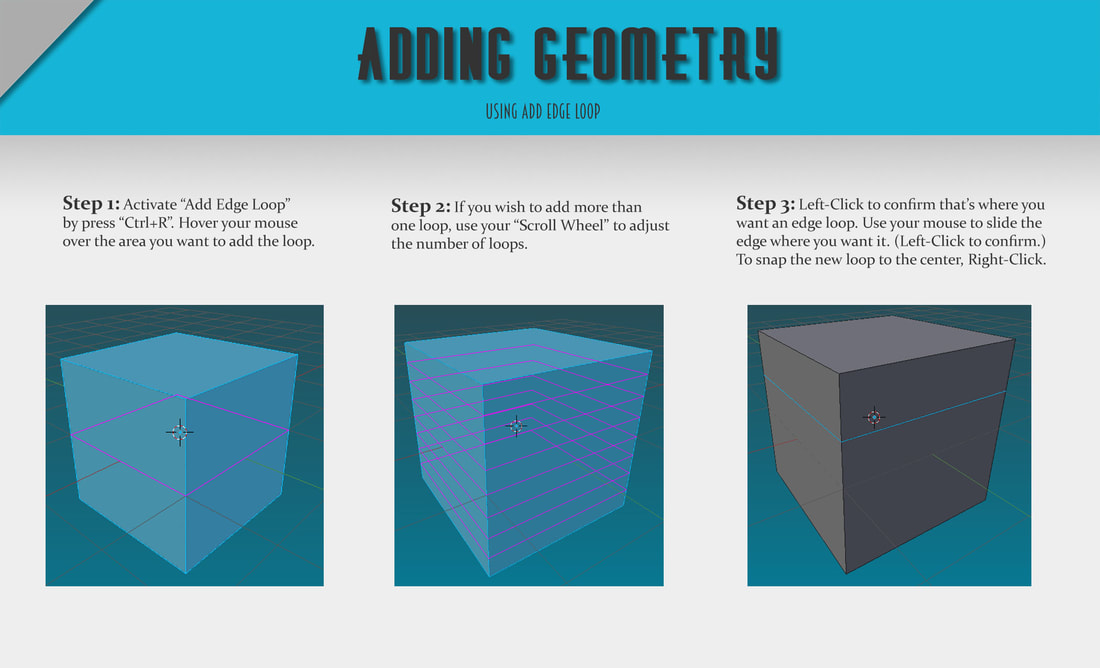
Use the guide to learn how to add edge loops. Create an edge loop and use scale to move the edges in and out.
A piece of this incorporates Bevel, which you learned in the last assignment.
A piece of this incorporates Bevel, which you learned in the last assignment.
06.
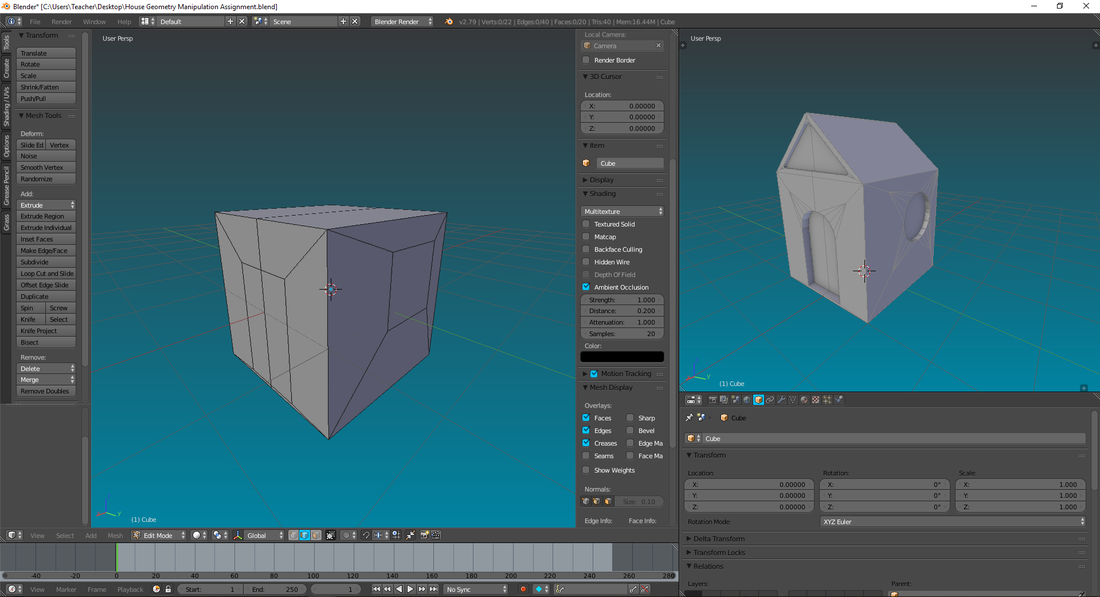
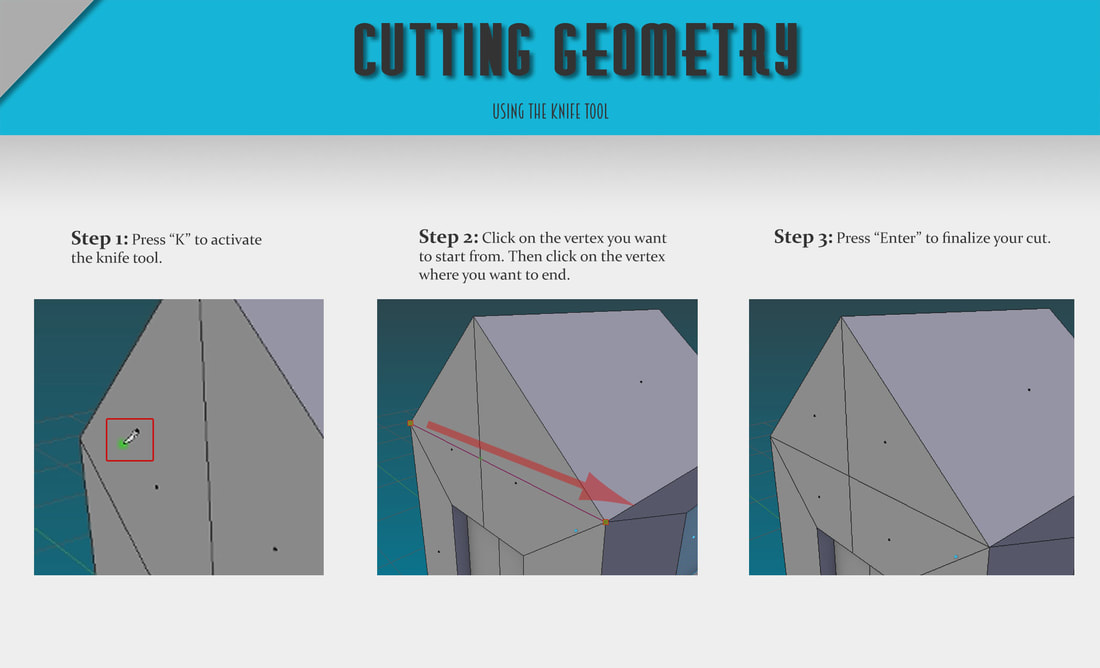
This assignment uses the Knife Tool. Look at the guide to learn the tool. (Hint: Use Face selection and extrude where you need to first.)
07.
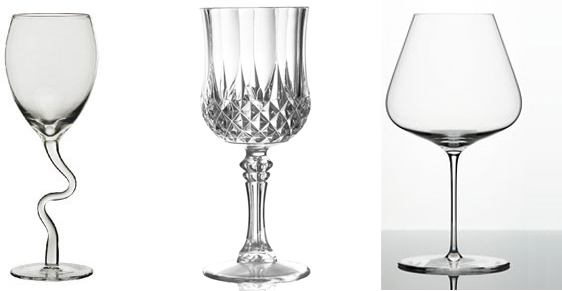
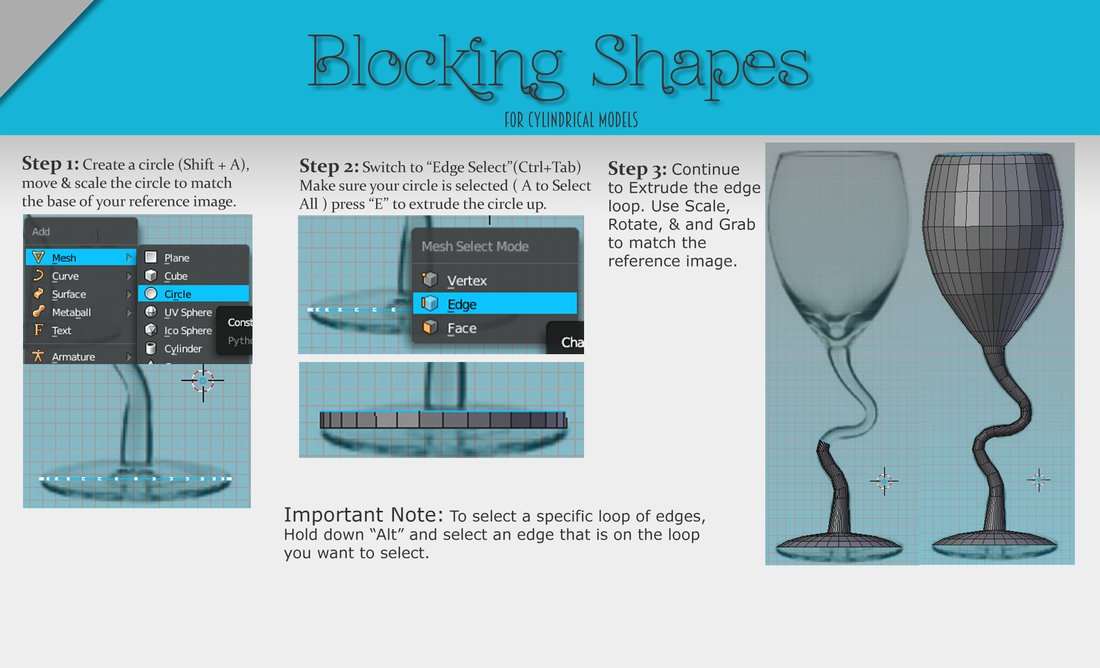
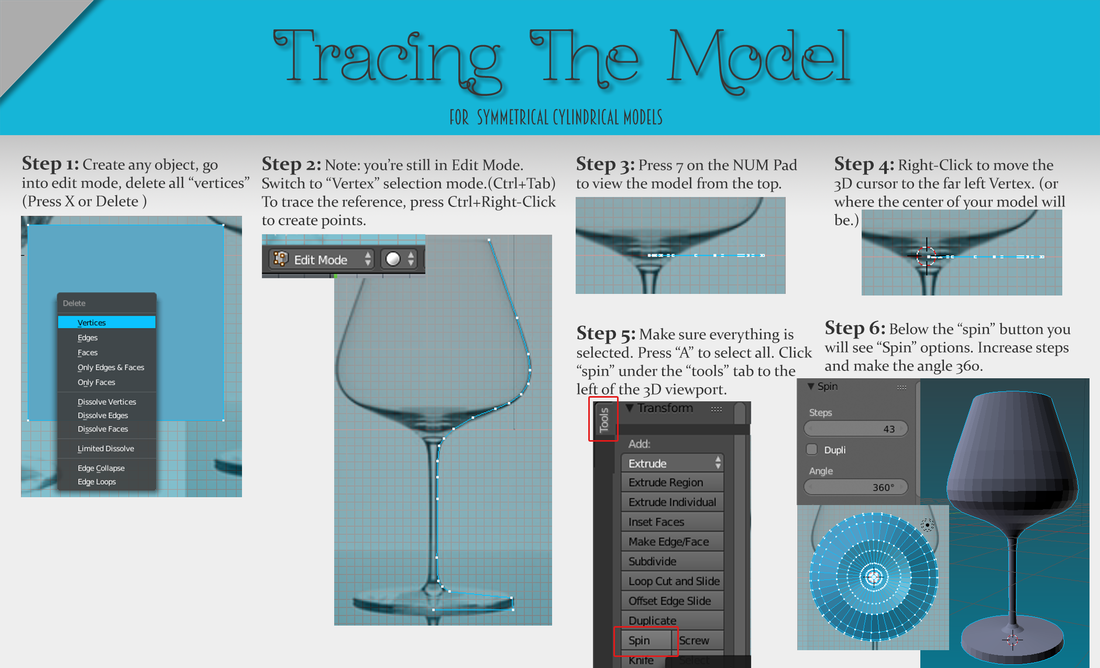
There are two methods for modeling cylindrical objects. The first involves extruding and scaling. The second is a lathe option(Only works with symmetrical cylindrical objects). Try out both.
08.
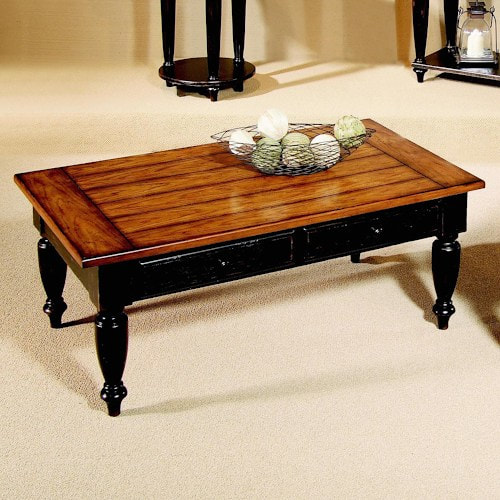
You did it! You made it to the final assignment in this section! Now, using all that you've learned so far, make this table. I believe in you.

